

Why Basement Moisture Is a Layered Problem
A damp basement rarely has a single cause. Water can enter through three distinct pathways: liquid intrusion (water flowing in through cracks or joints), capillary action (moisture wicking through porous concrete), and condensation (warm, humid air meeting cooler surfaces). Treating only one pathway while ignoring the others is why many basement waterproofing efforts fall short.
The most effective strategy works from the outside in. Start by redirecting surface water away from the foundation, then address the wall and floor assembly itself, and finally manage the humidity inside the finished or unfinished space. Each layer reinforces the others. Skipping the exterior work and jumping straight to interior coatings, for example, can trap hydrostatic pressure against the wall - potentially making the underlying problem worse over time.
Because some moisture-control work - particularly excavating exterior foundation walls or installing interior drainage systems - involves significant labor, cost, and in some jurisdictions, permits, it is worth diagnosing the primary source before committing to a repair path. A wet wall after rain points to different causes than persistent floor dampness during dry weather.
Never Ignore Active Water Intrusion
Visible water flowing through a foundation crack or joint is a sign of significant hydrostatic pressure and should be evaluated by a licensed waterproofing contractor - not simply patched with hydraulic cement and monitored. Unaddressed water infiltration can undermine the structural integrity of a foundation over time. If you notice bowing or cracking walls, consult a structural engineer before taking any other action.
Exterior Drainage: Your First Line of Defense
Most basement water problems originate above ground. Two straightforward exterior fixes resolve a large share of cases before water ever touches the foundation.
Lot Grading
The ground around your home should slope away from the foundation at a minimum rate of roughly 6 inches of drop over the first 10 feet. Soil settles over time, and a flat or inward-sloping grade channels rainwater directly against the wall. Regrading with compactable fill soil is a manageable DIY project for minor corrections; larger regrading jobs that affect drainage across the full lot may require a landscaping professional.
Gutters and Downspouts
Clean gutters at least twice per year - more often if you have nearby deciduous trees - so they move roof runoff away from the building efficiently. Downspout extensions should discharge water at least 4-6 feet from the foundation. Splash blocks help, but an underground extension pipe routed to a dry well or the street is more reliable in high-rainfall areas.
Extend Downspouts Before Anything Else
Before investing in any interior waterproofing product, extend your downspouts so they discharge at least 6 feet from the foundation. This single change resolves a significant percentage of basement seepage cases - especially in newer construction where soil settlement has altered the original drainage grade. It costs very little and can be done in an afternoon.
Also inspect window wells on below-grade windows. A well without a gravel base and a properly sealed flashing collar becomes a collection point that feeds water directly through the window frame. See our guide to maintaining windows and exterior doors for related sealing best practices.
Waterproofing the Foundation Walls and Floor
Once exterior drainage is optimized, wall and floor waterproofing addresses residual moisture pathways.
Exterior Waterproofing Membranes
Applied to the outside face of the foundation wall during construction - or during a full excavation retrofit - these membranes (typically polymer-modified asphalt or rubberized coatings) block water before it contacts the wall. They are the most effective long-term solution but also the most disruptive and costly to install after the fact. This work should always be performed by a licensed contractor.
Interior Masonry Coatings
Crystalline waterproofing compounds and hydraulic cement products can be applied to interior wall surfaces to resist capillary seepage. They work by filling pores and micro-cracks in the concrete or block wall. These coatings are most effective on walls subject to minor dampness, not active water flow. Surface preparation - cleaning, wire-brushing, and repairing obvious cracks - is critical to their performance.
Floor Vapor Barriers
An unfinished concrete slab is permeable to ground moisture. A 6-mil polyethylene vapor barrier placed over the slab (or under a subfloor assembly) significantly reduces moisture transmission into the space above. Seams should overlap by at least 12 inches and be taped; the barrier should run up the wall by a few inches and be secured or covered by the baseboard or framing.
Exterior Foundation Work Requires Permits
Excavating around a foundation to apply an exterior waterproofing membrane is major work that typically requires a permit in most U.S. jurisdictions, and must be performed by a licensed contractor in many states. Always verify local requirements with your municipality before beginning. Unpermitted work can create issues with homeowner's insurance claims and property resale.
Interior Drainage Systems and Sump Pumps
When water enters a basement despite exterior measures - common in areas with high water tables or clay-heavy soils - an interior drainage system channels it to a sump pit for removal rather than letting it pool on the floor.
Interior Perimeter Drains
A channel cut into the perimeter of the slab accommodates a perforated drain pipe that collects seeping water and routes it to the sump pit. This work requires breaking and replacing concrete and is best handled by a waterproofing contractor. It does not stop water from entering the wall, but it manages the water before damage occurs.
Sump Pumps
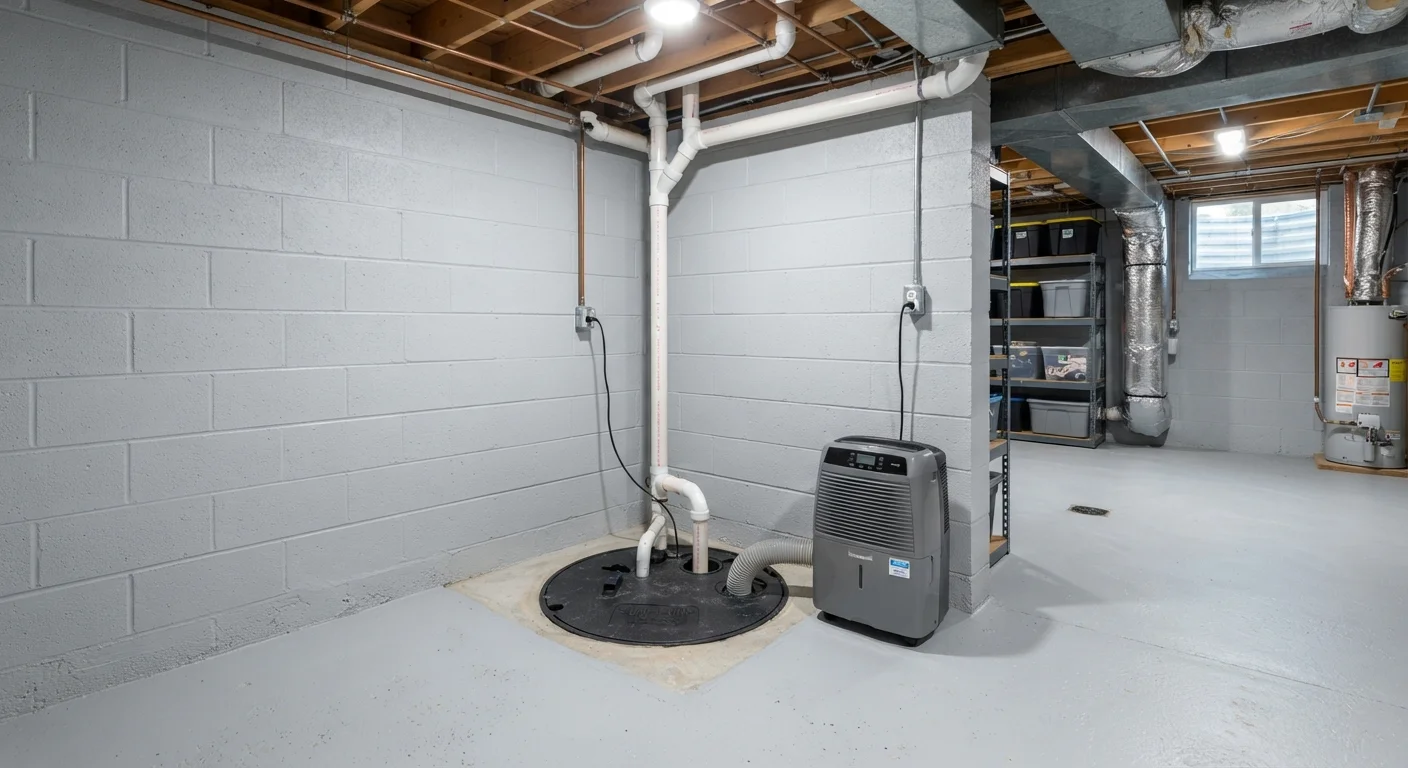
A sump pump is the collection point for all interior drainage. Test yours at least once a year - ideally each spring before rainy season - by slowly pouring water into the pit until the float triggers the pump. Key maintenance steps include cleaning the inlet screen, checking the discharge pipe for obstructions, and verifying that the check valve is functional.
When testing your sump pump annually, also confirm the float arm moves freely and isn't stuck against the pit wall - a jammed float is one of the most common causes of pump failure during an actual flood event.
Float mechanism failures often go undetected until the pump is needed, at which point the basement is already taking on water. A quick manual check costs nothing and takes seconds.
If you're seeing efflorescence - the white, chalky mineral deposits on basement walls - treat it as an early warning of capillary moisture movement, not just a cosmetic issue, and investigate the source before applying any surface coating.
Efflorescence is left behind when water carries dissolved salts through concrete and evaporates at the surface. It signals active moisture migration that will eventually compromise any coating applied over it.
A battery backup sump pump is strongly recommended. The storms most likely to overwhelm your basement are the same ones that knock out power. Battery-backup units activate automatically when the primary pump fails or loses power, providing critical protection during precisely the events that matter most.
Controlling Humidity Inside the Basement
Even a basement with no active water intrusion can accumulate damaging humidity through condensation. In summer, warm outdoor air carries significant moisture; when it enters a cool basement, that moisture condenses on walls, pipes, and framing. Left unmanaged, sustained humidity above roughly 60% relative humidity supports mold growth and wood rot.
Dehumidifiers
A dehumidifier sized to the square footage of your basement is one of the most effective humidity-control tools available. Whole-basement units with continuous drain connections (so you never need to empty a bucket) are particularly practical. Run the unit with the basement closed during humid weather; airing out a basement by opening windows on a hot, muggy day adds moisture rather than removing it.
Ventilation and HVAC Integration
If the basement is conditioned space (heated and cooled), integrating it into your home's HVAC system helps regulate humidity consistently. For unconditioned basements, ensure mechanical ventilation moves air out rather than simply recirculating it. Insulating cold water pipes prevents condensation from dripping onto the floor and contributing to ambient moisture.
For broader home sealing strategies that affect how moisture-laden air infiltrates from outside, our guide to weatherproofing your home covers gap and draft sealing in detail.
98%
Homes with basements experiencing moisture
According to the American Society of Home Inspectors, nearly 98% of homes with basements will experience some form of water problem over the building's lifetime.
60%
Relative humidity threshold for mold growth
The U.S. EPA notes that indoor relative humidity consistently above 60% creates conditions conducive to mold and dust mite proliferation.
$4,000-$10,000
Typical interior drainage system installation cost
HomeAdvisor and similar cost-tracking sources report that interior perimeter drain and sump pump systems typically range widely based on basement size and local labor rates.
Seasonal Maintenance Checklist
A routine inspection schedule catches developing problems before they become expensive repairs. Use this framework as a starting point and adjust timing for your local climate.
Spring
- Test the sump pump and battery backup before peak rain season.
- Inspect foundation walls for new cracks after winter freeze-thaw cycles.
- Check and clean gutters; confirm downspout extensions are still in place and unobstructed.
- Walk the perimeter and assess grading after soil settles post-winter.
Summer
- Monitor basement humidity; run a dehumidifier continuously during humid months.
- Inspect window well covers and ensure weep holes are clear.
- Look for condensation on pipes and add pipe insulation where needed.
Fall
- Clean gutters after leaves have fallen.
- Ensure downspouts are directing water well away from the foundation before ground freezes.
- Inspect exterior masonry for cracks that could allow water infiltration during freeze cycles.
Winter
- After significant snowmelt or thaw events, check the basement for seepage.
- Keep an eye on sump pump activity during winter rain events.
- Verify that basement windows are properly sealed - see our window and door maintenance guide for a full inspection process.
A well-organized basement is also easier to inspect. If clutter makes it hard to spot seepage or mold, consider the organization strategies covered in our guide to managing overlooked home spaces.
This article is for general informational purposes only. Home conditions, local building codes, and permit requirements vary widely. Consult a licensed contractor or waterproofing professional before undertaking structural, drainage, or foundation work.
The content on this site is for informational purposes only and is not a substitute for professional advice. Always consult a qualified professional for guidance specific to your situation.